Dealing with mold and mildew on tiles and grout can be a frustrating challenge that many homeowners face. If you’ve noticed those stubborn black or green spots creeping into your bathroom or kitchen tiles, you’re not alone! This article dives deep into how to clean mold and mildew from tiles and grout, sharing expert tips and proven methods that will restore your surfaces to their original sparkle. Wondering why mold loves your grout lines or what the safest yet most effective cleaning solutions are? Keep reading to discover easy, step-by-step techniques that anyone can follow.
Mold and mildew removal from grout and tiles isn’t just about aesthetics; it’s crucial for maintaining a healthy home environment. Left unchecked, mold spores can worsen indoor air quality and even cause allergic reactions. So, learning the best ways to clean mold and mildew from bathroom tiles or kitchen grout is not only smart but necessary. You’ll get answers to important questions like: What household products work best? How often should you clean to prevent regrowth? And can you safely tackle mold without harsh chemicals? Plus, we’ll reveal some insider secrets from professional cleaners that make the process faster and more effective.
Ready to say goodbye to unsightly mold for good? This guide is packed with natural remedies for mold and mildew on tiles, plus advice on maintaining a mold-free home. Whether you’re dealing with mild discoloration or heavy mold buildup, these expert-approved tips will empower you to take action today. Don’t miss out on the ultimate resource for cleaning mold and mildew from tiles and grout – your bathroom and kitchen deserve it!
Top 7 Proven Methods to Effectively Remove Mold and Mildew from Tile Grout
Mold and mildew on tile grout is one of those pesky problems that most homeowners in New York has probably faced at least once. It not only looks ugly but can also cause health issues like allergies and respiratory problems. Getting rid of it isn’t always easy, especially because grout is porous and mold loves to hide deep inside those tiny crevices. But don’t worry, this article will show you top 7 proven methods to effectively remove mold and mildew from tile grout, plus expert tips on how to clean mold and mildew from tiles and grout without too much hassle.
Why Mold and Mildew Grow on Tile Grout?
Before diving in the cleaning hacks, it helps to understand why mold and mildew grow on tile grout. Grout is made from cement, sand, and water, which makes it porous and absorbent. This means moisture easily seeps in, creating a perfect environment for mold spores to thrive. Bathrooms and kitchens are common spots since they are frequently exposed to water and humidity. Mold is a fungus that feeds on organic matter and thrives in damp, dark places. Mildew is a specific type of mold that usually appears flat and powdery.
Historically, people used natural ingredients like vinegar or lemon to clean tiles, but with the modern chemical cleaners, things got faster though sometimes harsher on grout.
Top 7 Methods to Remove Mold and Mildew From Tile Grout
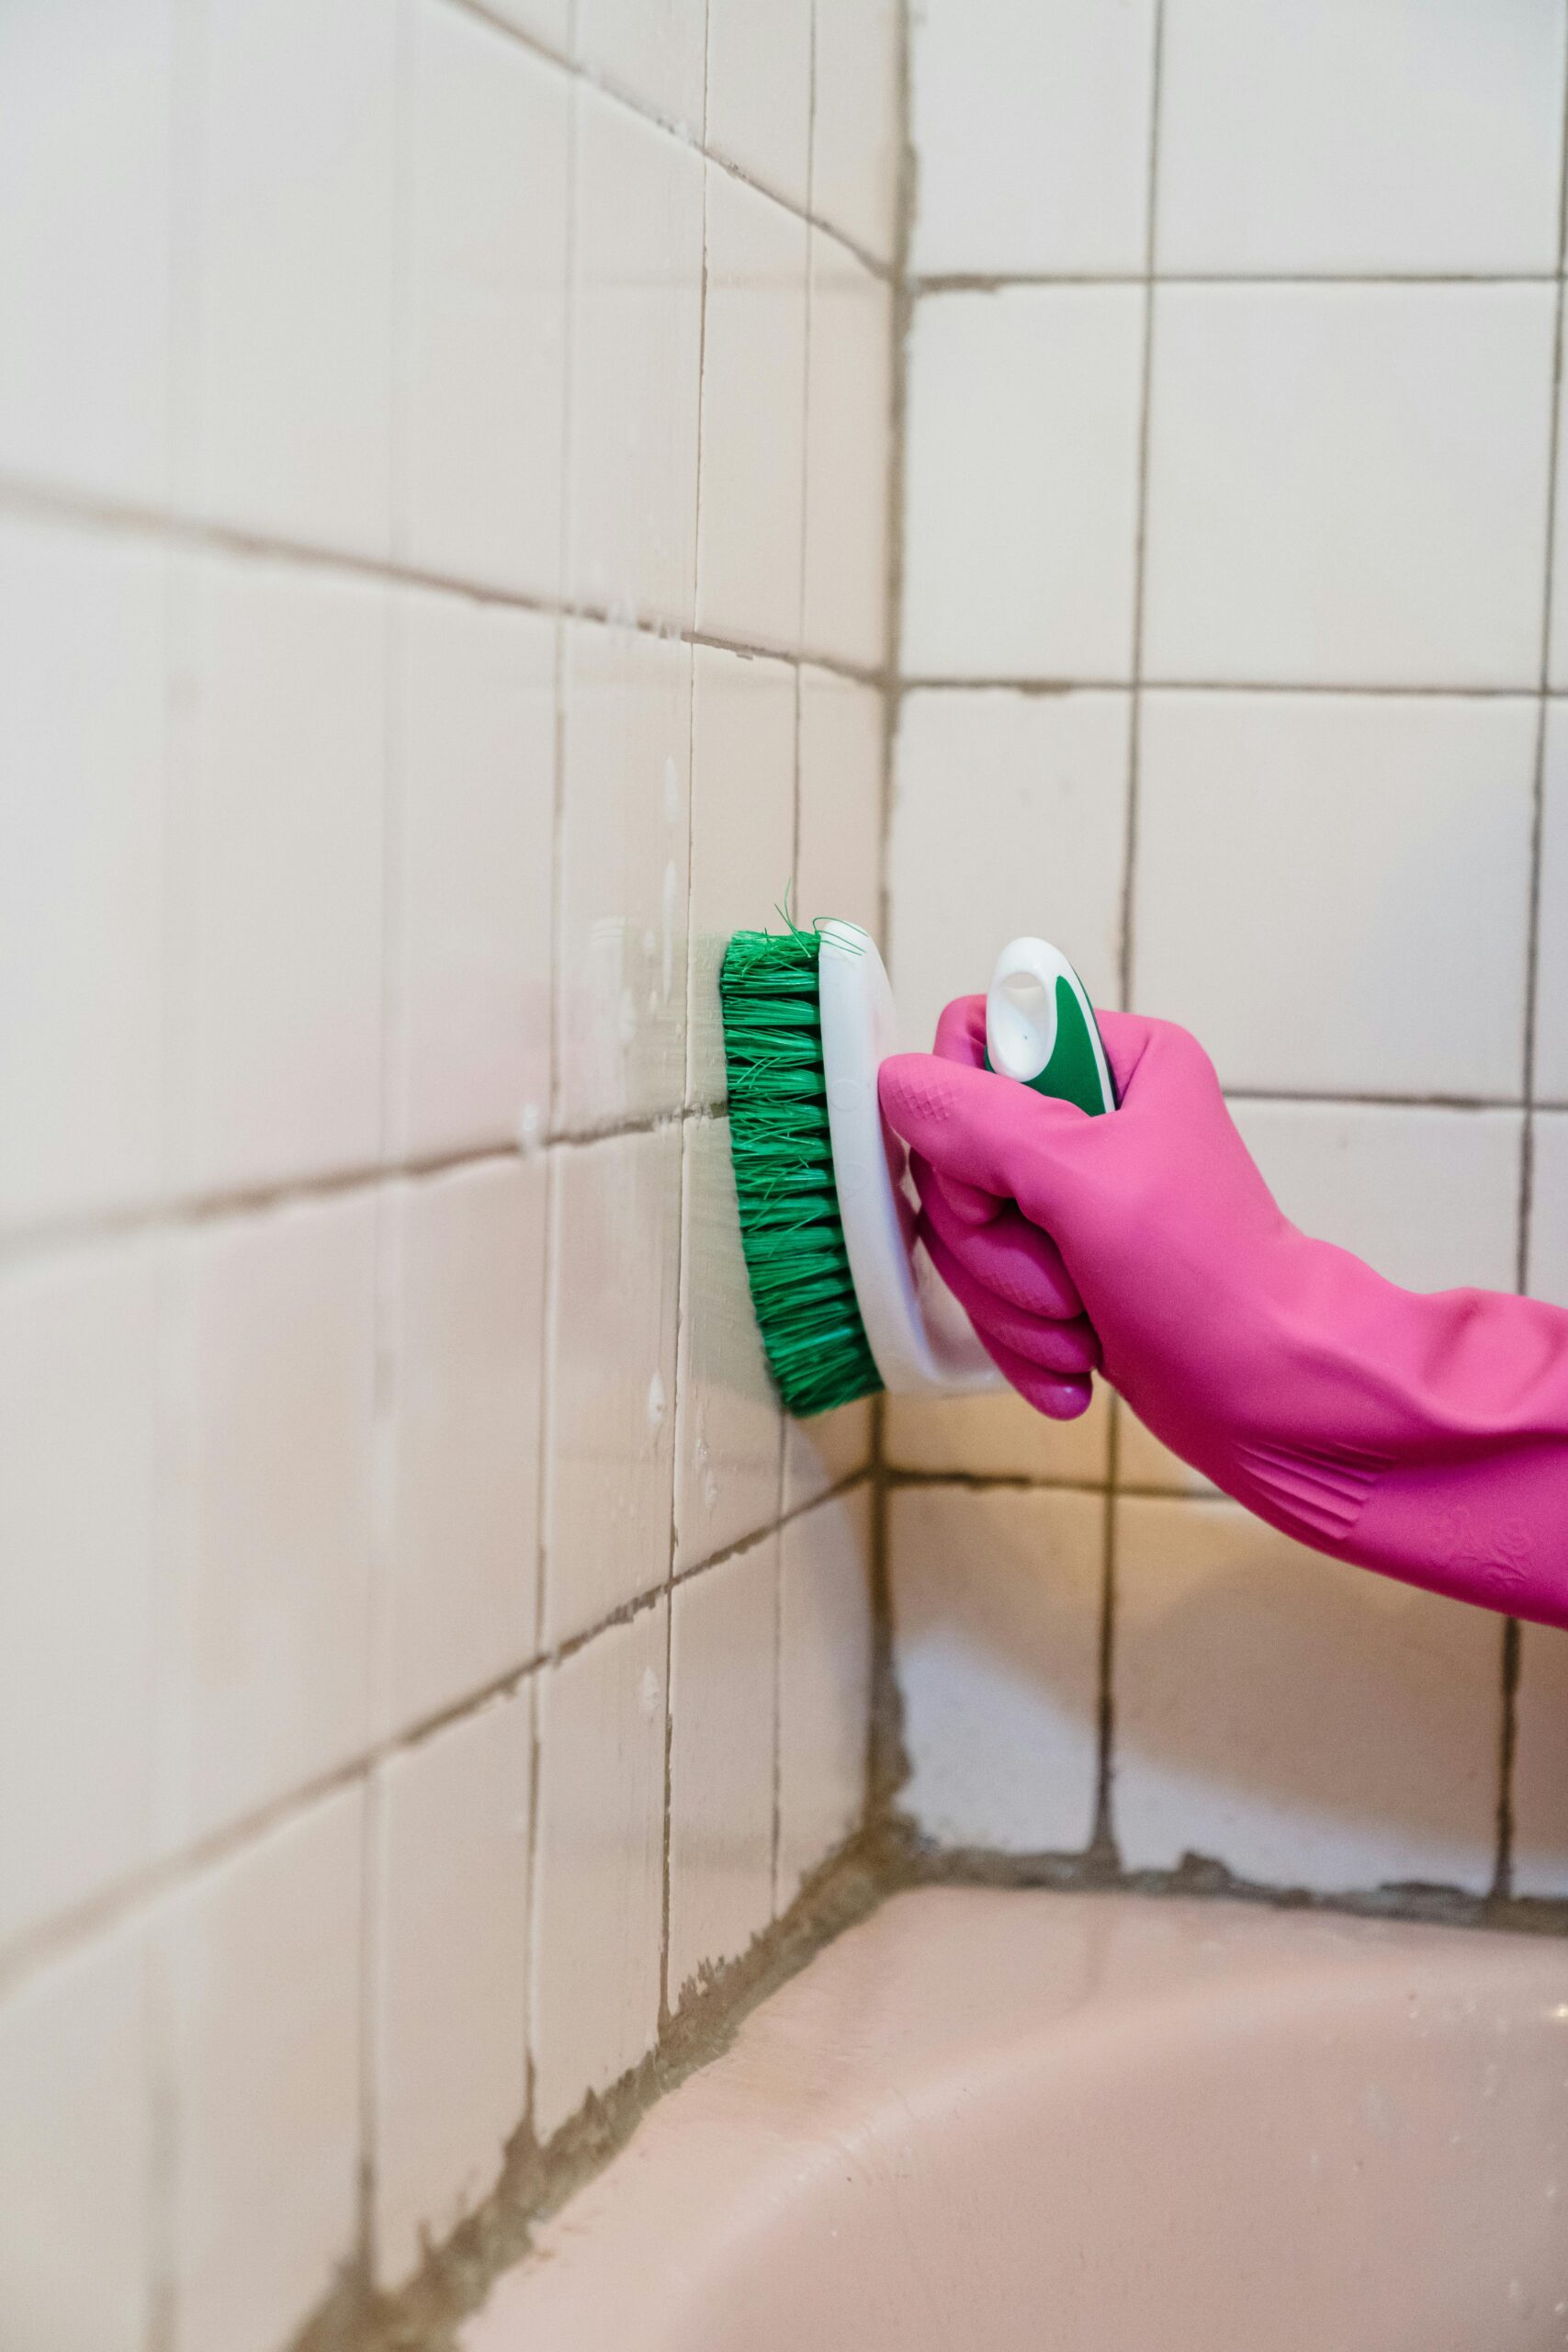
Here is a list of methods that you can try at home to get rid of that stubborn mold and mildew:
Baking Soda and Water Paste
- Mix baking soda with a little water until it forms a thick paste.
- Apply on grout and let it sit for 10-15 minutes.
- Scrub with a toothbrush and rinse with warm water.
- Baking soda is mildly abrasive and also deodorizes.
White Vinegar Spray
- Pour undiluted white vinegar into a spray bottle.
- Spray directly on grout and wait for about an hour.
- Scrub and rinse with water.
- Vinegar is acidic and kills about 82% of mold species.
Hydrogen Peroxide Application
- Use 3% hydrogen peroxide on grout.
- Let it bubble and sit for 10-15 minutes.
- Scrub with a brush and rinse.
- It works as a natural bleach and antifungal agent.
Bleach Solution (Use with Caution)
- Mix one part bleach with four parts water.
- Apply carefully to grout only, avoid tiles as bleach can discolor.
- Let it sit for 5-10 minutes then scrub and rinse.
- Bleach kills mold spores quickly but is harsh and toxic, so ventilate room well.
Steam Cleaning
- Use a handheld steam cleaner on grout lines.
- The high temperature kills mold without chemicals.
- Good for those who prefer eco-friendly methods.
Commercial Mold and Mildew Cleaners
- Many stores in New York sell specialized grout cleaners.
- Follow product instructions strictly.
- These often contain fungicides and surfactants.
Oxygen Bleach Powder
- Mix oxygen bleach powder with water to form a paste.
- Apply on grout and leave for 15-30 minutes.
- Scrub and rinse well.
- It’s less toxic than chlorine bleach and environmentally safer.
Expert Tips on How to Clean Mold and Mildew From Tiles and Grout
- Always test any cleaning solution on a small hidden area first to avoid damage or discoloration.
- Use a stiff-bristled brush but not metal as it can scratch tiles.
- Wear gloves and eye protection especially when handling bleach or strong chemicals.
- Ventilate your bathroom or kitchen well by opening windows or using an exhaust fan.
- After cleaning, dry the area thoroughly with a towel or fan to prevent mold from returning.
- Regular maintenance is key: wipe down tiles and grout after showers or cooking.
- Seal grout lines every 6-12 months to prevent moisture penetration.
Comparison Table: Cleaning Agents for Mold and Mildew Removal
| Cleaning Agent | Effectiveness | Safety Level | Cost | Ease of Use |
|---|---|---|---|---|
| Baking Soda | Moderate | Very safe | Low | Easy |
| White Vinegar | High | Safe | Very low | Easy |
| Hydrogen Peroxide | High | Moderate (caustic) | Low | Easy |
| Bleach Solution | Very High | Low (toxic fumes) | Low | Moderate |
| Steam Cleaner | High | Very safe | High (device) | Easy |
| Commercial Cleaners | Very High | Varies | Medium-High |
How to Identify and Prevent Mold Growth on Bathroom Tiles: Expert Cleaning Tips
Bathrooms are one of the most common places where mold and mildew tend to grow. If you live in New York, where humidity can be quite high, you probably already noticed some black or greenish spots appear on your bathroom tiles or grout. This not only looks unpleasant but can also cause health issues if left unattended. So, how to identify and prevent mold growth on bathroom tiles? And once you see it, what are the best ways to clean mold and mildew from tiles and grout? Let’s dive into some expert cleaning tips and practical advice to keep your bathroom fresh and mold-free.
What Is Mold and Why It Grows on Bathroom Tiles?
Mold is a type of fungus that thrives in moist environments. Bathrooms are perfect breeding grounds because there’s constant water vapor from showers, baths, and sinks. Mold spores are everywhere, floating in the air, but they only grow if conditions are right — moisture, warmth, and organic material like dirt or soap scum. Tiles themselves are usually mold-resistant, but grout, being porous, can trap water and dirt, making it a perfect home for mold.
Historically, before modern ventilation and cleaning products, bathrooms were notorious for mold problems. In old New York apartments, many people had to deal with stubborn mildew that damaged walls and tiles. Today, with better materials and knowledge, you can prevent mold growth with simple steps.
How to Identify Mold Growth on Tiles and Grout
Mold can sometimes be tricky to spot, specially in early stages.
Look out for:
- Black, green, or dark brown spots on grout lines or around tile edges.
- Musty, damp smell in the bathroom.
- Persistent dampness on walls or floors even after drying.
- Discoloration or staining on tiles that won’t come off with usual cleaning.
If you scratch the surface with a fingernail and the spot feels slimy or powdery, that is often mold or mildew.
How to Clean Mold and Mildew From Tiles and Grout: Expert Tips
Cleaning mold is not just about aesthetics; it’s also about maintaining a healthy environment. Here are some practical steps that have been recommended by cleaning experts:
- Gather Cleaning Supplies:
- White vinegar (natural mold killer)
- Baking soda (abrasive and deodorizer)
- Hydrogen peroxide (for stubborn mold)
- Old toothbrush or grout brush
- Spray bottle
- Rubber gloves and mask (to avoid inhaling spores)
- Microfiber cloth or sponge
- Initial Cleaning:
- Mix equal parts of white vinegar and water in a spray bottle.
- Spray the affected tiles and grout generously.
- Let it sit for at least 30 minutes to kill mold spores.
- Scrub the grout lines with an old toothbrush.
- Rinse with warm water and wipe dry.
- For Stubborn Mold:
- Make a paste of baking soda and water.
- Apply it directly to the moldy grout.
- Spray hydrogen peroxide over the paste.
- Let it fizz and bubble for about 10 minutes.
- Scrub again and rinse well.
- Regular Maintenance:
- Wipe down tiles after every shower with a squeegee or towel.
- Keep bathroom doors or windows open for ventilation.
- Use a dehumidifier if humidity stays high.
Preventing Mold Growth on Bathroom Tiles
Prevention is way better than cleaning mold repeatedly. Here are some tips which you can easily follow:
- Improve Ventilation: Install an exhaust fan or open windows to let moisture escape.
- Seal Grout Lines: Use a grout sealer every 6 months to make grout water-resistant.
- Use Mold-Resistant Paint: On bathroom walls and ceilings.
- Regular Cleaning: Clean tiles at least once a week with mild detergent.
- Fix Leaks Promptly: Any leaking pipes or faucets should be repaired immediately.
- Use Shower Curtains Wisely: Wash or replace shower curtains frequently because they can harbor mold too.
Comparison Table: Common Mold Cleaners for Bathroom Tiles
| Cleaner | Effectiveness | Safety | Cost | Ease of Use |
|---|---|---|---|---|
| White Vinegar | Moderate to high | Safe, non-toxic | Low | Easy (spray & wipe) |
| Baking Soda | Moderate | Safe, non-toxic | Low | Moderate (paste + scrub) |
| Hydrogen Peroxide | High (stubborn mold) | Safe but can bleach | Medium | Moderate (apply + scrub) |
| Bleach | Very high | Harsh, toxic fumes | Low | Difficult (ventilation needed) |
| Commercial Mold Removers | High | Varies (check label) | Medium to high | Easy to moderate |
Practical Example: Cleaning Mold from Your New York Bathroom Tile Grout
Imagine you
Step-by-Step Guide: Deep Cleaning Mold and Mildew from Tiles Without Harsh Chemicals
Step-by-Step Guide: Deep Cleaning Mold and Mildew from Tiles Without Harsh Chemicals
Mold and mildew on tiles are the kind of problem that every New Yorker with a bathroom or kitchen have faced at least once. They can make your space look dirty and smell bad, but also affect your health. Many people rush to buy harsh chemical cleaners that smell strong and can irritate your skin or lungs. But good news is, you don’t need to use these aggressive products to get rid of mold and mildew. With some simple household items and a bit of elbow grease, you can clean tiles and grout effectively without chemicals that might be harmful.
Why Mold and Mildew Grow on Tiles?
Mold and mildew are types of fungi that thrive in moist environments. The bathroom or kitchen is usually warm and damp, perfect for mold spores to grow. Tiles themselves don’t get damaged by mold, but the grout — the stuff between tiles — easily absorbs water and becomes a perfect place for mold colonies. Mold can cause discoloration (black, green, or white patches) and bad smells. It also can trigger allergies and respiratory problems if left untreated.
Historically, before chemical cleaners were widely available, people used natural methods like vinegar, baking soda, and sunlight to fight mold. These methods still works well today and are safer for your family and the environment.
How to Clean Mold and Mildew From Tiles and Grout: Expert Tips
Cleaning mold is not just about scrubbing, it also about prevention. Here some expert tips to keep in mind before starting your deep clean:
- Always wear gloves and a mask, mold spores can be harmful when inhaled.
- Open windows or use fans for good ventilation.
- Test your cleaning solution on a small hidden area first to make sure it does not discolor tiles.
- Don’t mix cleaning agents like vinegar and baking soda together at the same time; use them sequentially.
- Dry the area completely after cleaning to prevent mold from returning.
- Regular maintenance prevents mold build-up, so clean your tiles at least once a week.
Step-by-Step Guide: Deep Cleaning Mold and Mildew Without Harsh Chemicals
Here is a simple plan to get your tiles sparkling clean without using any dangerous chemicals:
Step 1: Prepare your cleaning solution
- Mix equal parts of white vinegar and water in a spray bottle. Vinegar is naturally acidic and can kill most mold species.
- Alternatively, you can make a paste using baking soda and water for scrubbing.
Step 2: Spray or apply the solution
- Spray the vinegar solution generously on the moldy tiles and grout. Let it sit for 10 to 15 minutes.
- If you use baking soda paste, apply it directly on mold patches using a toothbrush or small scrub brush.
Step 3: Scrub the area
- Use a soft-bristle brush or an old toothbrush to scrub the grout lines and tiles. Baking soda is abrasive and helps lift stains and mold.
- For tough mold, sprinkle some additional baking soda on the wet surface while scrubbing.
Step 4: Rinse thoroughly
- Rinse the tiles with warm water. You can use a sponge or cloth to wipe down.
- Make sure all the residue of vinegar or baking soda is removed to avoid leaving a film.
Step 5: Dry completely
- Use a dry towel or cloth to absorb moisture from tiles and grout.
- Leave the bathroom or kitchen door/window open to allow air circulation.
Comparison: Natural vs Chemical Cleaners for Mold on Tiles
Here a quick table that shows advantages and disadvantages of using natural methods compared to chemical cleaners:
| Aspect | Natural Cleaners (Vinegar, Baking Soda) | Chemical Cleaners (Bleach, Mold Removers) |
|---|---|---|
| Safety | Non-toxic, safe for family and pets | Can cause skin irritation, respiratory issues |
| Effectiveness | Works well for light to moderate mold | Very effective for heavy mold infestations |
| Environmental Impact | Biodegradable, eco-friendly | Often contains harmful chemicals, pollutes water |
| Cost | Very affordable, common household items | Usually more expensive |
| Smell | Mild, vinegar smell dissipates quickly | Strong, unpleasant chemical odor |
Practical Examples: When to Use What?
- For regular cleaning or mild mold growth, natural methods like vinegar spray and baking soda scrubbing works great.
- If you see black mold deeply embedded or spreading fast, you might need professional help or stronger chemical treatments. But always try natural methods first, because once chemicals used, it could damage grout color or tiles surface.
Maintenance Tips to Prevent Mold and Mildew
- Keep tiles dry after showers or cooking. Use a squeegee or towel to remove excess water.
- Use exhaust fans or open windows to reduce humidity.
Best DIY Solutions for Cleaning Mold and Mildew from Tiles and Grout Quickly
Mold and mildew on tiles and grout is a common problem, especially in places like New York where humidity and dampness often hangs around. These pesky black or greenish stains not only make your bathroom or kitchen look unpleasant but can also cause health issues if ignored. Lots of people struggle with finding the best way to get rid of them without spending too much money or time. So, lets dive into some of the best DIY solutions for cleaning mold and mildew from tiles and grout quickly.
Why Mold and Mildew Form on Tiles and Grout?
Before we jump into cleaning hacks, it’s good to understand why mold and mildew appear in first place. Mold and mildew are types of fungi — they thrive in moist, dark, and poorly ventilated areas. Tiles and grout, especially in bathrooms and kitchens, provide perfect breeding grounds because water often lingers there. Grout is porous, which means it absorbs water and becomes a perfect home for mold spores to settle in.
Historically, people used natural remedies like vinegar or baking soda for cleaning, long before chemical cleaners were available. These natural substances still works wonders today and are safe for your family and pets.
Best DIY Solutions for Cleaning Mold and Mildew from Tiles and Grout Quickly
Here are some popular, effective, and easy-to-follow methods you can try at home:
White Vinegar Spray
- Pour white vinegar into a spray bottle without diluting it.
- Spray generously on moldy tiles and grout.
- Let it sit for about an hour.
- Scrub with a brush and rinse with water.
Vinegar is acidic, which kills 82% of mold species and helps prevent future growth.
Baking Soda Paste
- Mix baking soda with a little water to create a thick paste.
- Apply the paste on moldy grout and tiles.
- Let sit for 10-15 minutes then scrub and rinse.
Baking soda deodorizes and gently abrasives the surface, removes stains.
Hydrogen Peroxide Solution
- Use 3% hydrogen peroxide (available in drugstores).
- Spray or apply on affected areas.
- Allow to sit for 10 minutes before scrubbing.
- Rinse well.
This is a natural antifungal agent that kills mold and lightens stains.
Tea Tree Oil Mixture
- Mix 1 teaspoon of tea tree oil with 1 cup of water.
- Spray on mold and mildew spots.
- No rinsing needed; just let it dry.
Tea tree oil is a natural fungicide and smells nice compared to chemical cleaners.
Commercial Mold Cleaners
- Products like Tilex or Clorox Mold Remover work fast.
- Follow instructions carefully.
- Make sure room is ventilated when using chemicals.
These are effective but may contain harsh ingredients that can irritate skin or lungs.
How to Clean Mold and Mildew From Tiles and Grout: Expert Tips
Cleaning mold is not just about scrubbing; there are some expert tricks to keep in mind:
- Always wear gloves and a mask to prevent inhaling spores.
- Use a stiff-bristled brush or an old toothbrush for grout lines.
- Avoid mixing bleach with ammonia or vinegar – it produces toxic fumes.
- After cleaning, dry the area completely with a towel or fan to prevent mold from coming back.
- Ventilate the bathroom or kitchen by opening windows or using exhaust fans regularly.
- Seal grout lines after cleaning with a grout sealer to prevent moisture penetration.
- For stubborn stains, repeat cleaning steps two or three times – sometimes mold can be very persistent.
Comparing Common DIY Solutions for Mold and Mildew
Here’s a quick comparison table to help you choose the best method for your needs:
| Method | Effectiveness | Safety | Cost | Time Required | Smell |
|---|---|---|---|---|---|
| White Vinegar | Medium-High | Safe | Low | 1 hour + scrubbing | Sharp, vinegary |
| Baking Soda Paste | Medium | Very Safe | Low | 15-20 minutes | Odorless |
| Hydrogen Peroxide | High | Moderate (avoid contact with eyes) | Low | 10-15 minutes | Mild |
| Tea Tree Oil | Medium | Safe (allergic reactions possible) | Medium | No rinse needed | Pleasant pine |
| Commercial Cleaners | Very High | Moderate-High (ventilation needed) | Medium-High | 5-10 minutes | Chemical smell |
Practical Examples from New York Homes
Many New
Why Mold Returns on Tiles and Grout – Plus Expert Tips to Keep It Gone for Good
Why Mold Returns on Tiles and Grout – Plus Expert Tips to Keep It Gone for Good
Mold and mildew on tiles and grout is a problem that a lot of homeowners, especially in New York, face regularly. It seems like no matter how much you clean, the mold comes back. You may wonder why is this happening? Why mold returns on tiles and grout again and again? Well, it’s not just because you didn’t clean well enough — there are several reasons behind this persistent little invader, and knowing them helps you fight mold better.
Why Mold Keeps Coming Back on Tiles and Grout
Mold is a type of fungus that thrives in damp, warm, and poorly ventilated places. Bathrooms and kitchens are prime spots because they have water, humidity, and often poor air circulation. But it’s not just the environment — the materials themselves play a role.
- Porous Nature of Grout: Unlike tiles, grout is porous, meaning it absorbs water and moisture easily. This creates perfect conditions for mold spores to settle and grow underneath the surface where regular cleaning can’t reach.
- Humidity Levels: New York’s humid summers and wet winters means moisture lingers longer indoors, especially in bathrooms without proper ventilation.
- Improper Ventilation: Mold thrives when air doesn’t circulate well. If your bathroom fan isn’t powerful enough or isn’t used regularly, moisture stays trapped.
- Soap Scum and Dirt Build-Up: These residues provide nutrients that mold feed on, making it easier for them to grow and stick around.
- Cracked or Damaged Grout: Tiny cracks create a hiding place for mold spores and make cleaning ineffective.
Historically, grout was made from cement mixtures that were quite porous. Newer sealants and epoxy-based grouts are less porous, but many older homes in New York still have traditional grout, which makes mold a constant enemy.
How to Clean Mold and Mildew From Tiles and Grout: Expert Tips
Cleaning mold and mildew from tiles and grout takes more than just wiping with a cloth. You need effective methods and sometimes professional help.
Here’s a simple outline of steps you can follow:
Gather Supplies:
- Baking soda
- White vinegar
- Hydrogen peroxide (3%)
- Old toothbrush or grout brush
- Spray bottle
- Gloves and mask (to avoid inhaling spores)
Ventilate the Area: Open windows and use fans to improve airflow.
Apply Baking Soda Paste: Mix baking soda with water to make a thick paste. Apply it on grout lines and let it sit for 10 minutes.
Spray Vinegar: Spray white vinegar over the baking soda paste. It will fizz and bubble which helps lift mold stains.
Scrub: Use an old toothbrush to scrub grout and tiles gently but firmly.
Rinse with Warm Water: Wash off the paste and vinegar mixture.
Hydrogen Peroxide Spot Treatment: For stubborn mold spots, dab some hydrogen peroxide on affected areas, leave for 10 minutes, then scrub and rinse.
Dry Thoroughly: Use a dry cloth or towel to wipe all surfaces and grout lines.
Comparison of Common Mold Cleaning Agents
| Cleaning Agent | Effectiveness on Mold | Safety for Home Use | Cost | Ease of Use |
|---|---|---|---|---|
| Baking Soda | Moderate | Very Safe | Low | Easy |
| White Vinegar | High | Safe | Low | Easy |
| Hydrogen Peroxide | Very High | Moderate (ventilate) | Moderate | Medium (handle carefully) |
| Bleach | Very High | Less Safe (toxic fumes) | Low | Medium (ventilation needed) |
Note: Bleach can damage grout over time and produce harmful fumes, so use cautiously.
Practical Examples From New York Homes
- In many New York apartments, bathrooms are small and ventilated poorly. Tenants often report mold coming back within weeks because steam from showers doesn’t escape.
- Older brownstone homes with their original cement grout see recurring mold problems despite multiple cleaning attempts.
- Some local DIYers have had success by installing exhaust fans or using dehumidifiers to reduce indoor humidity levels, which stops mold growth before it starts.
Tips to Keep Mold Gone for Good
- Seal Your Grout: Applying a grout sealer every 6 months creates a moisture barrier.
- Use a Squeegee: After every shower, wipe tiles and grout with a squeegee to remove excess water.
- Improve Ventilation: Install or upgrade exhaust fans in bathrooms and kitchens.
- Control Humidity: Use a dehumidifier during humid months.
Conclusion
Effectively cleaning mold and mildew from tiles and grout requires consistent effort and the right techniques. Throughout this article, we’ve emphasized the importance of using natural or commercial cleaning agents such as vinegar, baking soda, or bleach solutions, combined with proper scrubbing tools like brushes to thoroughly remove mold and mildew buildup. Regular maintenance, including keeping the area dry and well-ventilated, plays a crucial role in preventing recurrence. Additionally, sealing grout after cleaning can provide an extra layer of protection against moisture and mold growth. By following these steps, you can restore the appearance and hygiene of your tiled surfaces, ensuring a healthier living environment. Don’t let mold and mildew compromise your home’s cleanliness—take action today with these proven methods to keep your tiles and grout spotless and mold-free for the long term.


